Marina Lippincott

Here at MAKdigitaldesign, we know a thing or two about producing the right impression on clients and brands by making a vision into a reality. In this industry, it’s important to understand the psychology of what attracts and turns off potential customers — whether you’re a designer or partner — and how much bad imaging can affect your sale potential. Our own motto is always about creating beautiful and engaging experiences, which is why we compiled a list of suggestions on how to deliver the most effective and successful results using product photos in four easy steps to get your clients the slick and professional boost their businesses need.
Step One – You Don’t Get More by Adding Less
When online shopping, without the ability to actually see or hold products in their hands, shoppers want to envision the product and what it looks like in person. People may shop online out of preference or for the most obvious reason: convenience & time. This is a huge variable for the online shopping experience. Having products available right at their fingertips, it’s important that consumers are provided an online experience that is not only time efficient but enjoyable as well. Ensure this by having a sleek website design and images that are instantly eye-catching.
Push your clientele to take various photos of their products. This brings allure and reassures the customer in knowing what they are getting. Ending up with customers who aren’t satisfied with the end result of the product can bring unwanted damage to the reputation of the business. Getting tips from a photography standpoint could also prove to be beneficial. The better you sell the image, the better you sell the product.
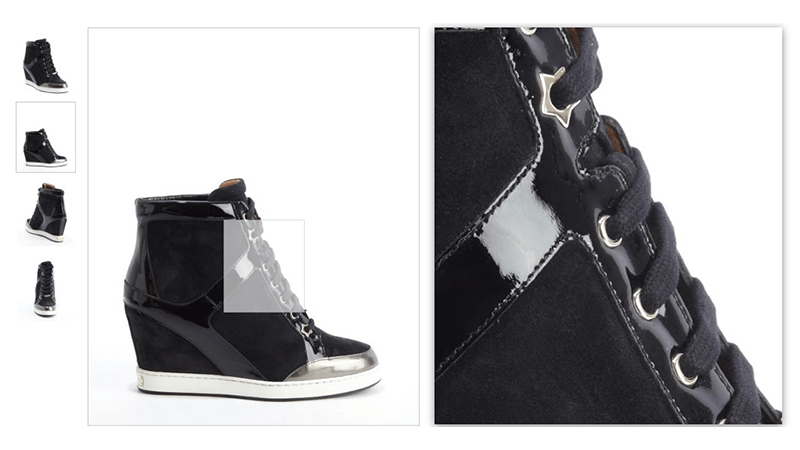
There will be one specific photo under the product listing that represents that item. Make sure to choose the photo that will make the best lasting impression. It’s important to add a series of photos that complement the collection of what you’re trying to sell. It’s recommended to use different angles, techniques, and textures to allow shoppers to get a feel for the entire product. In-context product images are a great way to finish off your layout. It transforms the image and brings the product to life.
When you place background textures, fruits, or other props with your finished product, you create a story — something visually pleasing that comes as close to the touch of the real thing as you can get, without actually touching it. If you use generated images through modern AI tools, make sure they match the tone of your real product photography to maintain consistency and avoid misleading your audience. Comparing new shots to previous campaigns can help evaluate what resonates best with your target market.
Step Two – Insisting on Consistency
The best way to attract customers is to offer a clean, sophisticated design. A white background is always a great choice, allowing your products to be viewed without distraction. Creating and using templates helps ease the process of scaling across categories or industries. The idea is to get a feel for how you want your images to be portrayed consistently.
With a template, the dimensions, style, and format will always be the same, and that creates a very slick appeal. There are various tools and programs available for creating these templates. Photoshop is a favorite, especially when you want to edit your photos, refine lighting or shadows, or match your overall brand aesthetics. There are also many free online tools available for businesses just starting out that can offer basic editing, cropping, and layout features without needing advanced software.
Step Three – Product Photography Size
Let’s take a moment to look at the big picture. Okay, now break that picture down smaller, smaller… AND smaller, until, well, you get the picture 😉 What do we get? A blur of pixelated colors instead of a reasonably sized photo.
To put it quite simply, a picture is made up of a combination of pixels. Pixels help us determine the length and width of an image. In the case of product images, bigger is always better. Now remember how we talked about templates? Applying the same concept, you can create a simplistic approach to keeping everything looking clean.
But beware of falling victim to the mentality many store owners have unfortunately taken to by resizing your images to fit the template size before uploading. If this approach is done correctly, your image will automatically resize to fit within the template. Also, placing a zoom feature can prove extremely beneficial. Detail is key when creating a shot that sells.
Incorporating AI to generate product photos at multiple resolutions can streamline this process — especially if you’re launching new products and want to stay visually competitive in your category or marketplace.
Step Four – Simplicity Goes a Long Way

The one thing vital to take away from these steps is the importance of keeping the main focus on the image. The less complicated, the easier it will be for customers to get a feel for your product and for the simple but also sleek overall vision.
As step two suggests, the best method is to stick with a white background so it’s compatible with other interfaces. It’s better to let your product sell itself than to try and do so with a bunch of hype!
This, of course, is just a back-to-basics, general guideline — but keeping these tips in mind will prove useful for all of your or your client’s needs. Whether you’re prepping for a product launch, uploading your first logo, or trying to build a social media presence, creating the right product ads starts with the right product images.
Only with time and patience comes perfection.